Microsoft Word hyperlinks behave like those you commonly see on an email or web page. So, when you link text, graphics, or anything else in-between, they become click-through, letting you connect outside information to your document or another place within the document. For example, a table of contents is essentially a table of… hyperlinks or a hyperlink dialog box that connect to another place in the document. This way, you can quickly bring the reader to the exact place you want them to be within the document or to an external site, a different file, or a pre-addressed email message.
Insert a link
1. Open your Microsoft Word document.
2. Then, choose the text, image or graphic you want to make a hyperlink.
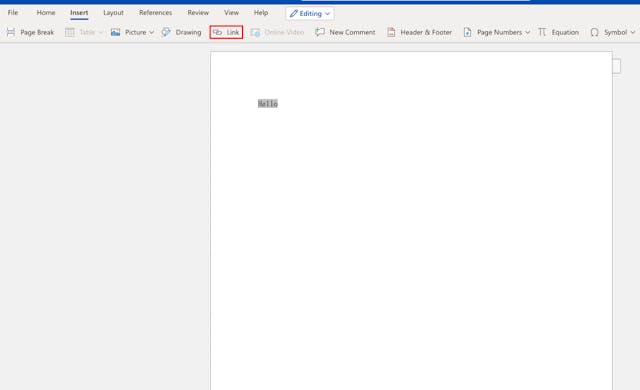
3. Click on the Insert section.
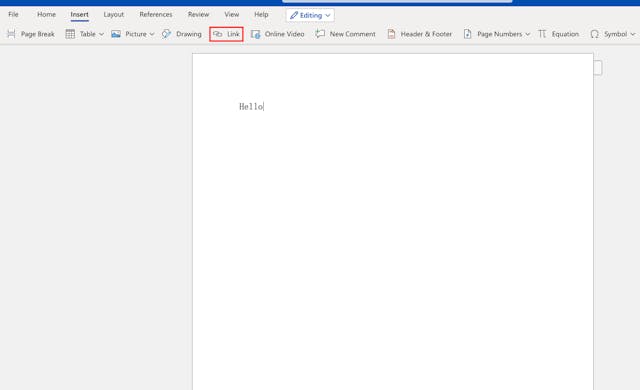
4. And expand the Links group. Now, if you’re using the desktop version of Microsoft Word, click the Link tab. However, if you’re using Word Online version, all you have to do is just click the Link button.
5. Press Ctrl + K (PC) or Command + K (Mac) to open the Insert Hyperlink window. Alternatively, you can get to the menu by selecting the Insert tab and then clicking the Link button in the relevant toolbar.
6. Enter a web address or select a file.
- To link a site or a file that’s accessible on the internet, you need to type or past the full address, which includes the https:// part at the beginning, into the Address section.
- To link a file located on your local network or computer, choose the existing file from the center of the panel. If it’s inside the current folder, just click Current folder in order open it and view its contents. If you’ve opened it recently, you should click on Recent Files. Of course, if you want to, you can use the relevant menus, located at the very top in order to navigate to the right folder. From there, choose the file.
- From this window, you can create a blank document, too, if you don’t want to open a specific file. Click Create a new document, then choose a location to store it.
7. (Optional) Set a ScreenTip. You can click the ScreenTip button at the top-right corner to change how the text appears when users put the cursor on the link. If you don’t change it and leave it as is, the screen tip will display the file path or website address.
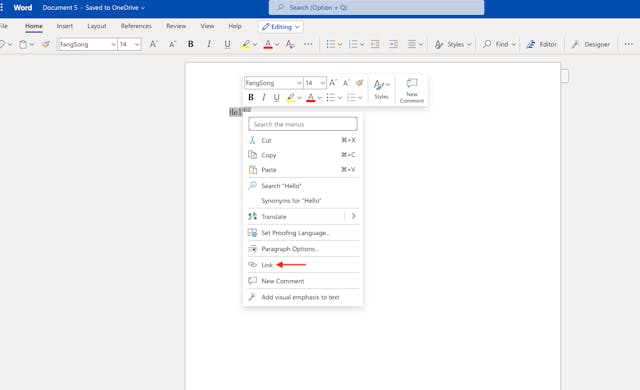
7. Press OK to save your link. If you’re using the Microsoft 365 version, just press the Insert button. You can now test your link by holding down the Ctrl (PC) or Command (Mac) button on your keyboard while clicking it.
8. Editing a hyperlink is not hard! Just click on it and select Edit Hyperlink. If you want to delete a link, click on it and choose Remove Hyperlink. That’s all!
Linking to a blank email message
1. Select the text or the image you want to turn into an email link. Keep in mind, you can use any image or text in your document. Once this is done, clicking the selected text or graphic should bring up a new email message to your desired address.
2. Open the Insert Hyperlink window with Ctrl + K (PC) or Command + K (Mac). Alternatively, you can get to the menu by selecting the Insert tab and then clicking the Link button in the relevant toolbar.
3. Click E-mail address in the left panel. This lets you set up your blank email message.
4. Enter the subject and email address. The recipient will see the information you enter into the Subject field when they receive the email. As to the email address, the email address you enter is the address the email will be sent to.
Some notes:
- If you’re using Outlook, you can view previously used email addresses. If you like, you can select one of those to send your email message to.
- Some email apps might not recognize the subject line. Something to have in the back of the mind.
5. (Optional) Set a ScreenTip. You can click the ScreenTip button at the top-right corner to change how the text appears when users put the cursor on the link. If you don’t change it and leave it as is, the screen tip will display the file path or website address.
6. Click OK to save your link. If you’re using the Microsoft 365 version, just press the Insert button. You can now test your link by holding down the Ctrl (PC) or Command (Mac) button on your keyboard while clicking it. Your default email app (i.e., Outlook, Mozilla Thunderbird, etc.) will open to a new message that contains the address you entered previously.
How to link to a location inside the same doc
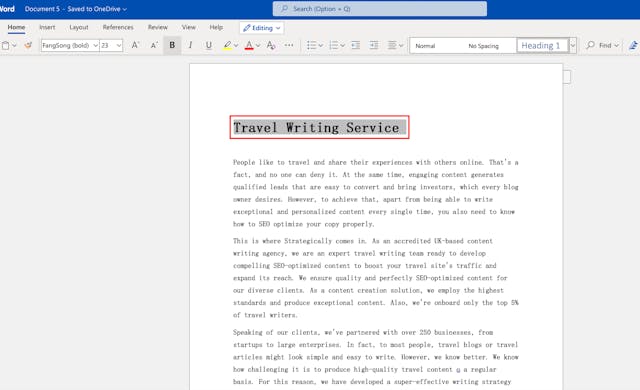
1. Place your mouse cursor where you want to link to. Creating links to places in your document is easy. All you have to do is use the Bookmark tool. This is a handy tool for citations, tables of contents, and glossaries, among other things. Also, you can choose an image, highlight specific text, or place the curse wherever you want within the document.
2. You cannot add bookmarks in Word Online. Unfortunately, adding bookmarks isn’t allowed in Word Online. You would have to use the desktop version to get access to the Bookmark tool.
3. Click the Insert tab. You can find it in the menu bar, which is located at the top of the Word.
4. Click the Bookmark button. Click the Links tab at the top of the Word. The toolbar should be next to the Link button.
5. Name your bookmark. Ensure the name you choose is descriptive, so that you can recognize it. That is super important for people using many bookmarks. It’s also helpful if multiple team members are editing the same document.
As a side note, remember that bookmark names have to begin with letters and can contain letters, though not at the beginning of the word. Also, you may use underscores but not spaces.
6. Click Add and insert the bookmark. Now, bookmarks will appear on the document page and may have brackets around them. The bookmark and the brackets are not usually visible in modern versions of Word, though in previous versions, they might.
7. If you really want to view brackets surrounding the bookmark, so you remember where you left it, just click on the Filemenu and select Options. After, click Advanced in the left panel. After, scroll down the right panel and find the relevant box next to Show bookmarks under Show document content.
8. At this step, create your link by selecting a portion of text, an image, or a graphic. Just highlight the text or click on the image you want to make a hyperlink.
9. Open the Insert Hyperlink window with Ctrl + K (PC) or Command + K (Mac). Alternatively, you can get to the menu by selecting the Insert tab and then clicking the Link button in the relevant toolbar.
10. Click Place in This Document in the left panel. It shows the navigation tree, which has your bookmarks and heading styles.
11. Choose the bookmark you like to hyperlink to. Begin by expanding the so-called Bookmarks tree, and choose the bookmark you’ve created. If you like, you can select the heading styles you’ve used in your document. If you don’t, it’s fine.
12. (Optional) Set a ScreenTip. You can click the ScreenTip button at the top-right corner to change how the text appears when users put the cursor on the link. If you don’t change it and leave it as is, the screen tip will display the file path or website address.
13. Click OK and save the link. Now, you may test it by pressing the Ctrl (PC) or Command (Mac) button as you click it. This re-centers the view to the line on which you placed the bookmark.
Conclusion
Microsoft Word is one of the world’s most powerful word processors and is used extensively by industry professionals, including content writing and SEO optimization solutions, like Strategically. Learning how to add hyperlinks to your Word documents can be a life-saver and help you lead your prospects further down the conversion funnel.
If you need help with content creation and SEO optimization, send us a message and get in touch for a quote. Or we can have a quick 15-minute call to set the foundation of your content strategy. Of course, we can also help you to edit hyperlinks, insert a hyperlink, or edit hyperlink dialog box.

